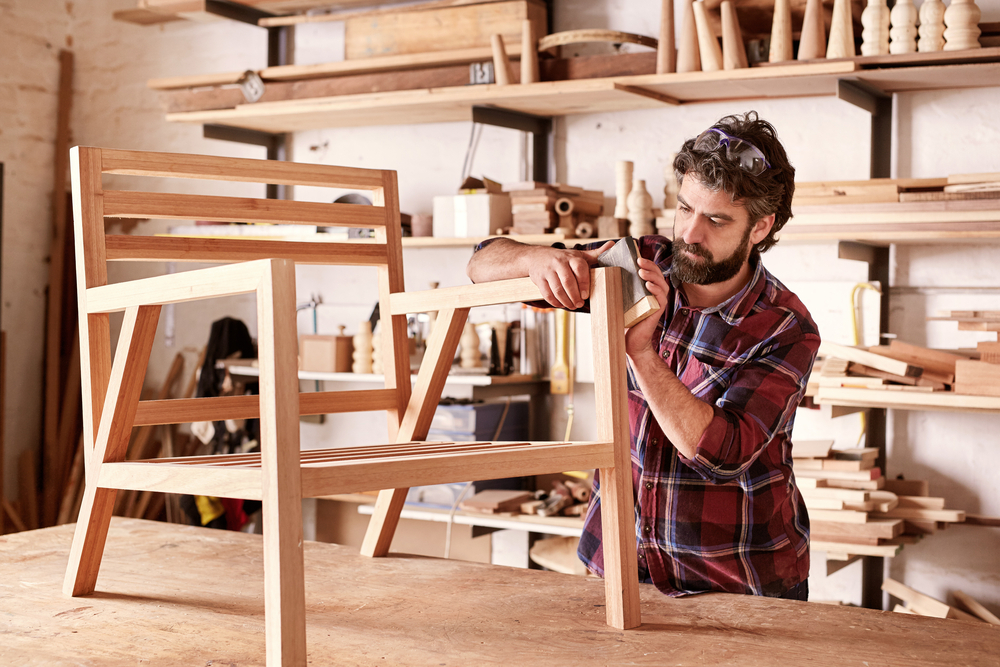
When it comes to woodworking, having a sturdy workbench is essential. A workbench provides a solid foundation for your projects and ensures stability and accuracy in your work. While plenty of workbenches are available, building your DIY wood workbench can be a rewarding and cost-effective option.
This article will guide you through creating your workbench, from the tools and materials needed to the finishing touches and customization options. Whether you are a seasoned woodworker or a beginner, this step-by-step guide will help you create a workbench that suits your needs and enhances your woodworking experience.
Benefits of Building Your Workbench
Building your workbench offers several advantages over buying a pre-made one. Here are a few key benefits:
- Customization: When constructing your workbench, you can tailor it to suit your individual needs and preferences. You can choose the size, height, and most suitable project features.
- Cost savings: Purchasing a high-quality workbench can be pretty expensive. Building your own can save significant money while ensuring a sturdy and durable work surface.
- Skill development: Building a workbench is an excellent opportunity to enhance your woodworking skills. It allows you to learn new techniques and practical experience that can be utilized in future projects.
- Bonding experience: If you involve your friends or family in the building process, it can become an engaging and fun activity that strengthens your relationships and creates lasting memories.
- Pride of ownership: Completing a project from scratch brings a sense of satisfaction and pride. Constructing your workbench allows you to take pride in the knowledge that you’ve crafted a functional and aesthetically pleasing piece of furniture.
Tools and materials needed for building a wood workbench
Before embarking on your DIY wood workbench project, you must gather the necessary tools and materials. Here is a list of essentials:
Tools:
- Circular saw or table saw.
- Drill and drill bits
- Screwdriver
- Clamps
- Measuring tape
- Chisel
- Mallet
- Sandpaper
- Router (optional)
- Jigsaw (optional)
Materials:
- Lumber (2x4s and plywood)
- Screws
- Wood glue
- Wood stain or paint (optional)
- Varnish or polyurethane (optional)
- Protective gloves and safety glasses
This sturdy 30-inch by 6-foot-long DIY workbench is the epitome of simplicity. It’s crafted from just fifteen 8-foot-long 2x4s and one sheet of 1/2-inch plywood, offering better functionality than many higher-priced tool workbenches.
Follow the cutting diagrams in Figure B to cut the plywood tops and in Figure C to cut all the framing components. Use the lengths specified in the Cutting List. You can assemble the framing either by screwing it together with 3-inch screws or by hand- or power-nailing it with 3-inch nails. Secure the plywood in place with 1-5/8-inch screws.
Project Step To Build a DIY Wood Workbench

Building a workbench can be broken down into several key steps. Here’s a step-by-step guide to help you navigate through the construction process smoothly:
Step 1: Assemble the Workbench Frames
The first step in building your DIY wood workbench is to assemble the wooden frames for the workbench surface and lower shelf. Start by cutting the pieces of lumber according to the dimensions specified in your plans. Then, using a screws, attach the pieces to form the frames. Make sure to check for squareness and use clamps to hold the pieces in place while you screw them together. Once the frames are assembled, you can move on to the next step.
Step 2: Attach the Legs
Once the frames are assembled, it’s time to attach the legs to the work surface frame. Position the legs at each corner of the frame and use screws to fasten them in place securely. Ensure the legs are flush with the frame and level with each other to ensure stability. Repeat this process for all four legs, double-checking the alignment before moving on to the next step.
Step 3: Attach Lower Frame
Now that the workbench surface and legs are connected, it’s time to attach the lower shelf frame. Flip the workbench upside down and position the lower shelf frame between the legs. To ensure proper support during installation, use gallon paint cans or similar objects to prop up the lower shelf frame. Secure the frame to the legs using screws, making sure it is level and flush with the legs and work surface frame.
Step 4: Attach the Work Surfaces
With the lower shelf frame in place, it’s time to attach the plywood work surfaces to the frames. Measure and cut the plywood to fit the dimensions of the workbench surface and lower shelf. Use screws to secure the plywood to the frames, ensuring that it is tightly fastened and even. This will provide a smooth and durable work surface for all your projects.
Step 5: Build the Top Shelf Frame
Next, assemble the top shelf frame according to the provided instructions. Measure and cut the necessary pieces of lumber and use screws to fasten them together securely. Ensure the frame is level and square before proceeding to the next step.
Step 6: Finish the Top Shelf
Once the top shelf frame is assembled, it’s time to add the plywood to finish the top shelf. Measure and cut the plywood to fit the dimensions of the top shelf frame. Utilize screws to secure the plywood to the frame, ensuring a tight and flush attachment along the edges. This will provide additional storage space for tools and materials.
Step 7: Add the Top Shelf Legs
Attach the top shelf legs to the workbench while the top shelf is flipped upside down. Position the legs at each corner of the top shelf frame and use screws to fasten them in place securely. Ensure the legs are level and aligned with the rest of the workbench structure.
Step 8: Put it All Together
With all the components prepared, it’s time to assemble the workbench. Fasten the top shelf legs to the workbench using screws, ensuring that they are securely attached and level. Once the legs are attached, install the backer boards to provide additional stability and reinforcement to the workbench structure. Double-check all connections and make necessary adjustments to ensure the workbench is sturdy and reliable.
Step 9: Additional Accessories
To make your workbench even more functional, you can add accessories to enhance your woodworking experience. Here are some suggestions:
Install Lighting
Adequate lighting is essential for any workbench. Purchase an affordable 4-foot shop light and attach it securely to the underside of the top shelf. This will provide ample lighting for your projects and ensure you can see your work.
Install Power Outlet
Mount a power strip to one of the legs to provide convenient access to power for your tools. This will remove the necessity for extension cords and simplify the process of plugging in and utilizing your equipment. Additionally, you can use the power strip to control the lighting, further simplifying your workspace setup.
Install a Vise
A bench vise proves to be a versatile tool capable of securely gripping your workpiece as you work on it. Securely bolt a bench vise to one corner of the workbench. While a quality bench vise may be a significant additional expense, it will greatly enhance the functionality of your workbench and allow you to tackle a wider range of projects.
Tips for ensuring a sturdy and durable workbench

To ensure your DIY wood workbench is sturdy and durable, consider the following tips:
- Choose high-quality materials: Invest in solid wood and durable plywood that can withstand heavy use.
- Reinforce joints and connections: Use wood glue and screws to reinforce the joints and connections between the various components of the workbench.
- Add diagonal bracing: Incorporate diagonal braces or supports to increase stability and prevent wobbling.
- Use appropriate hardware: Choose screws, bolts, and other hardware explicitly crafted for woodworking tasks, capable of enduring the weight and pressure exerted on the workbench.
- Test for stability during construction: Regularly check the stability of the workbench as you progress through the construction process. This allows you to identify and address any stability issues early on.
Finishing touches and customization options

After completing the primary construction, you have the opportunity to incorporate final touches and tailor your workbench to align with your preferences. Consider the following options:
- Paint or stain: Apply stain to the workbench to safeguard the wood and improve its visual appeal. Select a color or finish that harmonizes with your workshop or reflects your personal style.
- Add a vice: Install a vice on the workbench to securely hold materials while working. This can be a valuable addition to woodworking and other projects.
- Include storage options: Attach hooks, pegboards, or shelves to the workbench for easy organization and access to tools and supplies.
- Personalize with branding or logos: You can add your branding or logos to give the workbench a unique touch.
Remember, the finishing touches and customization options are entirely up to your preferences and needs. Take time to consider what will enhance your workbench’s functionality and aesthetics.
Maintaining and caring for your workbench

For longevity and optimal performance of your DIY wood workbench, adhere to these maintenance guidelines:
- Clean regularly: Remove dust, debris, and any spills from the workbench surface. Use a damp cloth or a mild cleaning solution as needed.
- Inspect for damage: Regularly inspect the workbench for any signs of damage, such as cracks or loose joints. Repair or replace any damaged components promptly.
- Protect against moisture: Avoid exposing the workbench to excessive moisture or humidity, which can cause warping or rotting. If needed, contemplate applying a protective coating or sealant.
- Maintain the finish: Periodically inspect the workbench’s finish and reapply paint, stain, or varnish as needed. This will safeguard the wood and maintain its appearance.
- Store tools properly: When not in use, store your tools in a designated area or toolbox to prevent clutter and potential damage to the workbench.
By following these maintenance practices, you can maximize the lifespan of your workbench and ensure it remains in excellent condition for years to come.
Alternative options for building a workbench

While building a DIY wood workbench is a popular choice, there are alternative choices to consider:
- Purchasing a pre-made workbench: If you prefer not to undertake the construction yourself, various pre-made workbenches are available. Look for one that meets your size, stability, and additional feature requirements.
- Repurposing existing furniture: You can repurpose old tables, cabinets, or other items such as workbenchs. With some modifications and additions, you can transform them into functional work surfaces.
- Modular workbench systems: Modular workbench systems offer flexibility and adaptability. They consist of individual components that can be assembled and arranged to create a custom workbench. These systems often include options for storage, shelves, and accessories.
Consider these alternative options based on your skill level, time constraints, and specific needs.
FAQs
How long does it take to build a DIY woodworkbench?
The time required to build a DIY woodworkbench depends on factors such as your skill level, the complexity of the design, and the availability of tools. On average, it may take a few hours to several days to complete the construction.
Can I build a workbench without power tools?
While power tools can speed up and make the construction process more efficient, building a workbench using hand tools is possible. However, it may require more time and effort.
How much does it cost to build a DIY wood workbench?
The cost of building a DIY woodworkbench can depend on the size, materials used, and additional features. Typically, a basic workbench can cost between $100 and $500 on average.
Can I modify the design of the workbench as I go along?
Yes, you can modify the design of your workbench as you go along, especially if you encounter any challenges or discover new preferences. Flexibility and adaptability are key to creating a workbench that suits your needs.
Can I use a workbench for purposes other than woodworking?
Absolutely! While workbenches are commonly associated with woodworking, they can be used for various purposes. They provide a sturdy and versatile surface for various DIY projects, crafts, or even as a general-purpose table.
Conclusion
Building your DIY wood workbench can be fulfilling and practical for any woodworking enthusiast or DIYer. Following the step-by-step guide and considering this article’s tips and customization options, you can create a workbench that meets your specific needs and preferences. Whether you build it from scratch or explore alternative options, the benefits of having a sturdy and reliable workbench are undeniable. So, roll up your sleeves, gather your tools, and build your DIY wood workbench today!
GET IN TOUCH
Find Storage Units Near You!
Storage Unit Size Guides
5×5 Storage Unit Guide
GET IN TOUCH
Find A 5×5 Storage Unit Near You!
5×10 Storage Unit Guide
GET IN TOUCH
Find A 5×10 Storage Unit Near You!
10×10 Storage Unit Guide
GET IN TOUCH
Find A 10×10 Storage Unit Near You!
10×15 Storage Unit Guide
GET IN TOUCH
Find A 10×15 Storage Unit Near You!
10×20 Storage Unit Guide
GET IN TOUCH
Find A 10×20 Storage Unit Near You!
10×25 Storage Unit Guide
GET IN TOUCH
Find A 10×25 Storage Unit Near You!
10×30 Storage Unit Guide
GET IN TOUCH
Find A 10×30 Storage Unit Near You!
New SecureSpace Self Storage Facilities
SecureSpace Self Storage Maspeth Queens

59-20 Borden Ave, Maspeth, NY 11378
SecureSpace Self Storage Miami Coral Way

2811 Coral Way, Miami, FL 33145
SecureSpace Self Storage Downtown Los Angeles

1535 Essex St, Los Angeles, CA 90021
SecureSpace Self Storage Van Nuys

SecureSpace Self Storage Rancho Penasquitos

10389 Azuaga Street, San Diego, CA 92129
SecureSpace Self Storage Livingston

644 W Mount Pleasant Ave, Livingston, NJ 07039
SecureSpace Self Storage Philadelphia Glenwood

2501 N 15th St, Philadelphia, PA 19132
SecureSpace Self Storage Langhorne

SecureSpace Self Storage Manhattan

424 East 90th Street, New York, NY 10128
SecureSpace Self Storage College Point

131-21 14th Ave, College Point, NY 11356
SecureSpace Self Storage Seattle Greenwood

9309 Aurora Ave N, Seattle, WA 98103
SecureSpace Self Storage Elmsford


Checkout Some Of Our Teams Favorite Articles


- California – Northern Self Storage
- Antioch, CA
- Berkeley, CA
- Los Gatos, CA – Farley
- Los Gatos, CA – University
- Milpitas, CA
- Richmond, CA
- San Jose, CA – Hedding
- San Jose, CA – Lonus
- San Jose, CA – Teresa
- San Leandro, CA